Creating & Editing Documents
Watch this topic in 60 seconds
Free preview · Lesson 1
Understanding Creating & Editing Documents
Let's Create and Edit Documents! Your Guide to Digital Writing
Hello, Future Digital Master! Have you ever wanted to write a story, create a school report, or even just jot down a grocery list on a computer? Well, you're in the right place! This lesson is all about learning how to make and change (or 'edit') documents on a computer, just like a superhero learns to use their special powers. Think of a document as any piece of writing – it could be an email, a letter, a story, or even a presentation. It's like your digital notebook or sketchbook where you can put down all your ideas!
Part 1: Building Your Digital Playground – Creating a Document
Imagine you want to draw a picture. What's the first thing you need? A blank piece of paper, right? Creating a document on a computer is very similar! You need a blank 'digital paper' to start writing.
1. Finding Your Tools: The Word Processor
Just like an artist uses a paintbrush and paint, you'll use a special computer program called a word processor. Think of a word processor as your digital art studio, but for words! Popular word processors include programs like Microsoft Word or Google Docs. They give you all the tools you need to write and make your text look nice.
To start, you usually open the word processor program. It might have an icon that looks like a blue 'W' (for Word) or a blue sheet of paper.
2. The Blank Page: Starting a New Document
Once your word processor is open, you'll usually see an option to create a 'New Document' or 'Blank Document'. Clicking this is like grabbing a fresh, empty sheet of paper. Voilà! You now have a blank screen, ready for your thoughts!
3. Getting Your Words Down: Typing!
Now for the fun part: typing! Your computer's keyboard is your magical pen. Each time you press a letter key, that letter appears on your blank digital page. Press the 'Spacebar' for a space between words, and the 'Enter' or 'Return' key to start a new line or paragraph (like starting a new sentence on a new line in your notebook).
Analogy: Think of typing as building with LEGO bricks. Each letter is a brick, and you're carefully putting them together to build words, sentences, and paragraphs.
4. Don't Lose It! Saving Your Work
This is one of the MOST important steps! Imagine you spent hours building a magnificent LEGO castle. Would you just leave it out in the rain to be ruined? Of course not! You'd put it somewhere safe. Saving your document is like putting your work in a super-safe digital box so it doesn't disappear when you close the program or turn off the computer.
- How to Save: Look for a 'File' menu at the top of your program, then click 'Save' or 'Save As'. Often, there's also a little picture icon that looks like a floppy disk (a very old way to save data!) that you can click.
- Naming Your Document: When you save for the first time, the computer will ask you for a 'File Name'. This is like giving your LEGO castle a name, like 'My Awesome Castle'. A good name helps you find it later, for example, 'My Science Report' or 'Story About a Dragon'.
- Where to Save: The computer will also ask 'Where do you want to save it?'. Think of this as choosing which shelf or box in your room to put your LEGO castle. You might choose your 'Documents' folder or a specific folder for 'School Work'.
Part 2: Making It Shine – Editing Your Document
Once you've written something, you might want to make changes. Maybe you made a mistake, or you want certain words to stand out, or you want to move a sentence around. This is where 'editing' comes in! Editing means changing or improving your document.
1. Selecting Text: Pointing to What You Want to Change
Before you can change anything, you need to tell the computer *what* you want to change. This is called selecting text. It's like using a highlighter pen to mark the words you want to focus on.
- How to Select: Click your mouse at the beginning of the word or sentence you want to select, hold the mouse button down, and drag your mouse across the text. The selected text will usually turn a different color (like blue or grey).
2. Basic Editing Superpowers: Cut, Copy, and Paste
These three tools are like magic tricks for your words!
- Cut: Imagine you have a cool sticker on one page of your notebook, but you want to move it to another page. 'Cut' is like carefully peeling the sticker off. The text disappears from its original spot, but don't worry, it's not gone! It's temporarily stored in a special 'clipboard' (a digital holding area).
- Copy: Now imagine you want to make an exact duplicate of that cool sticker so you can put it in two different places. 'Copy' is like making a photocopy. The text stays in its original spot, and a duplicate is also placed on the clipboard.
- Paste: After you 'Cut' or 'Copy' something, you need to 'Paste' it! This is like sticking your sticker onto the new page, or sticking the photocopy down. To paste, you click your mouse where you want the text to appear, then click the 'Paste' button.
You'll often find these options by right-clicking on selected text, or in the 'Edit' menu, or as little icons (scissors for Cut, two overlapping pages for Copy, and a clipboard for Paste).
3. Erasing Mistakes: Deleting Text
Made a typo? No problem! Just like you use an eraser on pencil marks, you can delete text on the computer. Simply select the text you want to remove, and then press the 'Delete' key on your keyboard. Poof! It's gone.
4. Making Your Words Pop: Text Formatting
This is where you make your document look fancy! Formatting means changing how your text looks. These options are usually found in a toolbar near the top of your word processor, often with a 'B', 'I', or 'U' button.
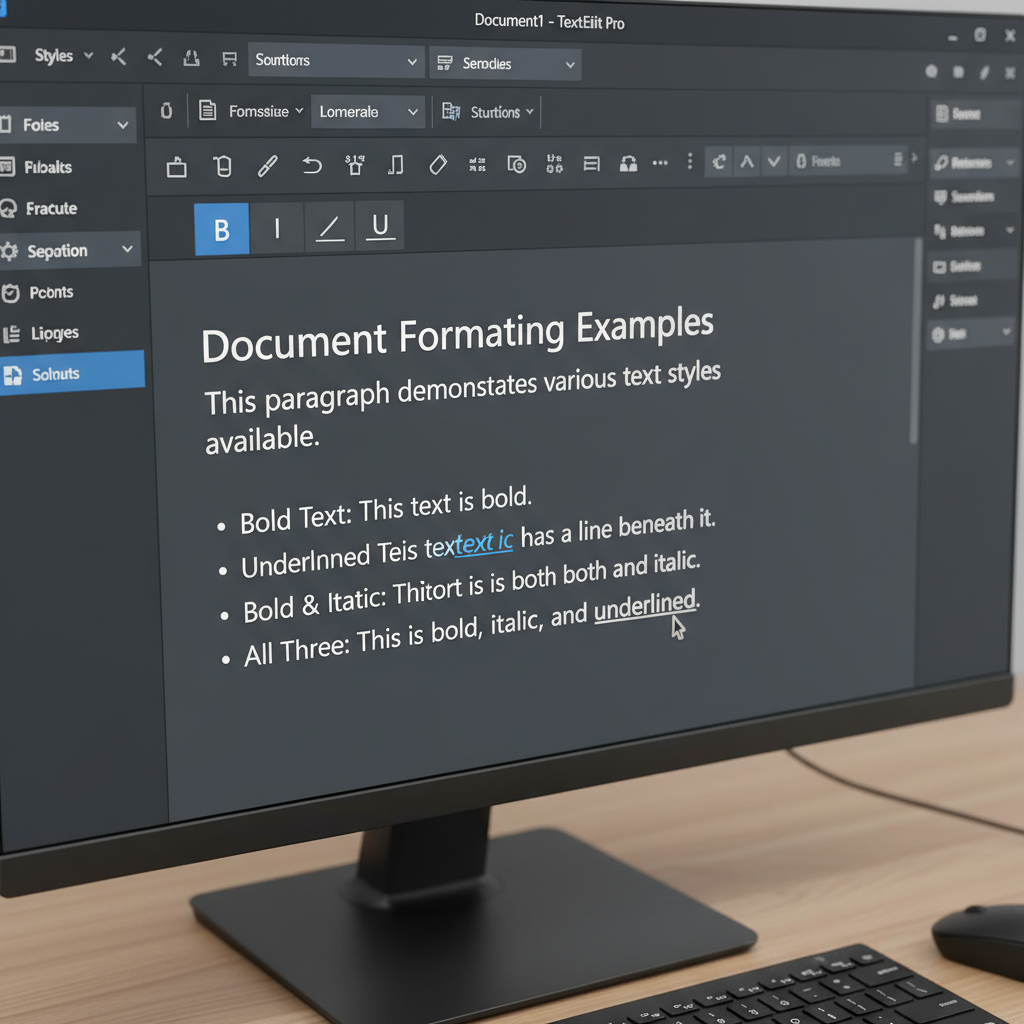 ⚠️ This picture may have spelling mistakes. Trust the words in the lesson.
- Bold (B): Makes text thicker and darker. Use it for important words or titles! (Analogy: like shouting a word to make it heard!)
- Italic (I): Makes text lean to the side. Great for emphasis or titles of books. (Analogy: like whispering a word, making it sound a bit different.)
- Underline (U): Puts a line under the text. Also good for drawing attention to specific words. (Analogy: like drawing a line under important notes in your notebook.)
- Font Size: This changes how big or small your letters are. You can make a giant title or tiny footnotes! (Analogy: like choosing a big brush for a big painting, or a small brush for tiny details.)
- Font Color: Want to use red for a warning or blue for a calm message? You can change the color of your text! (Analogy: like using different colored pens or crayons.)
Part 3: Keeping Things Tidy – Organizing and Opening
Just like a well-organized backpack helps you find your books, well-organized computer files help you find your documents!
1. Folders: Your Digital Filing Cabinets
Remember when you saved your document and chose a spot? That's where folders come in. Folders are like physical folders or drawers in a filing cabinet. You can create different folders for different types of documents – one for 'School Projects', one for 'My Stories', one for 'Family Letters', etc. This keeps your digital world neat and easy to navigate.
2. Opening an Existing Document
After you save your work and close the program, you'll want to open it again later to continue working or to show someone. To do this, you usually go to the 'File' menu and choose 'Open'. Then, you navigate to the folder where you saved your document, find its name, and click 'Open'. It's like finding your LEGO castle in its safe box and taking it out to play again!
Conclusion: Your Document Journey Begins!
You've just learned the foundational steps to creating and editing documents. These skills are super important in school, at home, and will be incredibly useful as you grow older. Keep practicing, experiment with different tools, and soon you'll be a master of digital documents!
Keep learning, free
Create a free Syllabax account to unlock practice questions and games for this topic.
Visual Learning Enhanced! 🚀
To help you master this topic, we use Advanced Syllabax AI to generate detailed diagrams and visual models.
Note on Visuals: The AI sometimes makes spelling errors in image labels. Please refer to the lesson text for the correct terminology.