Word Processing Basics
Watch this topic in 60 seconds
Free preview · Lesson 1
Understanding Word Processing Basics
Welcome to the World of Word Processing!
Hey there, 7th graders! Have you ever wanted to write a story, create a school report, or even just jot down some notes without using a pen and paper? Well, that's exactly what a word processor helps you do! Think of a word processor as your super-powered digital notebook or a fancy, futuristic typewriter that lives inside your computer or tablet. It lets you type words, arrange them, change how they look, and so much more!
What is a Word Processor? (Your Digital Notebook)
At its heart, a word processor is a computer program that helps you create, edit, and print text documents. Instead of writing by hand, you type on a keyboard, and your words appear on the screen. It's like having an endless supply of paper and an eraser that magically makes mistakes disappear!
- Create: You can start a brand-new document from scratch.
- Edit: You can change words, fix typos, or move sentences around.
- Format: You can make your text bold, italic, change its color, or make it bigger or smaller.
- Save: You can keep your work safe so you can open it again later.
- Print: You can turn your digital document into a physical piece of paper.
Some popular word processors you might hear about include Microsoft Word, Google Docs (which works online!), and LibreOffice Writer. They all do similar things, just with slightly different looks and buttons.
The Word Processor's Main Parts (Your Workspace)
When you open a word processor, you'll usually see a few key areas:
- The Document Area: This is the big, blank space in the middle of your screen. It's like the piece of paper where all your words will appear.
- The Cursor: This is a small, blinking vertical line (like a tiny lighthouse beacon!) in the document area. It shows you exactly where the next letter you type will appear.
- The Ribbon or Menu Bar: This is usually at the top of the screen, packed with lots of buttons and options. Think of it as your super-organized toolbox, holding all the tools you need to write and decorate your document. Each tool has a specific job, just like a hammer is for nails and a screwdriver is for screws.
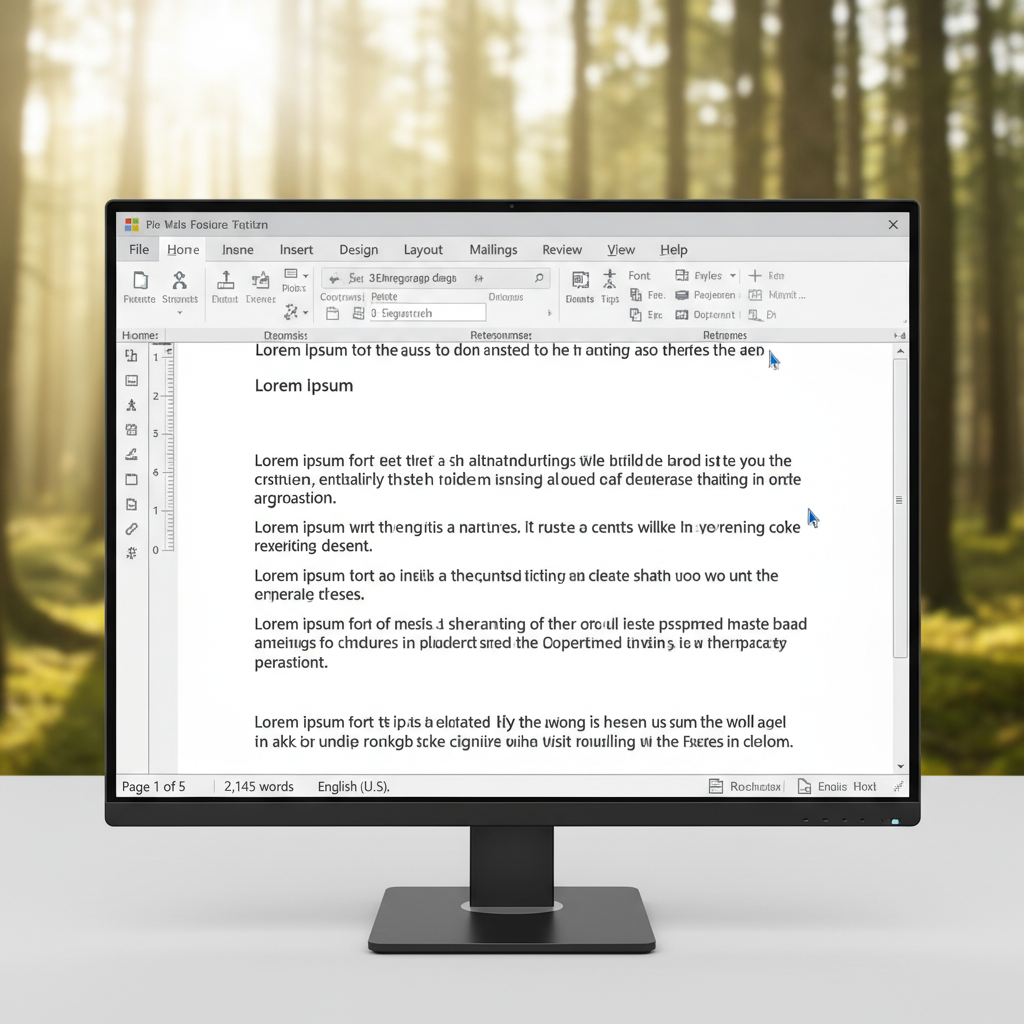 ⚠️ This picture may have spelling mistakes. Trust the words in the lesson.
A typical word processor window, with the document area, ribbon, and cursor visible.
Typing and Deleting (Getting Your Words Down)
Typing is super straightforward. Just start pressing keys on your keyboard, and watch your words magically appear where the cursor is blinking! If you make a mistake, don't worry:
- Press the Backspace key to erase characters to the left of the cursor. It's like a digital eraser rubbing out one letter at a time.
- Press the Delete key to erase characters to the right of the cursor.
Saving Your Work (Putting Your Treasures in a Safe Box)
Imagine spending hours building an amazing LEGO castle. Would you just leave it outside in the rain? Of course not! You'd put it somewhere safe. Saving your document is just like that. It stores your work on the computer so you don't lose it if the power goes out or if you close the program by mistake.
To save, you usually look for a button that looks like a floppy disk (a symbol from old computers, but it still means 'save'!) or go to the 'File' menu and choose 'Save' or 'Save As'. When you save for the first time, you'll give your document a name (like 'My Awesome Story') and choose where to store it on your computer (like in your 'Documents' folder).
Pro Tip: Save your work often! It's like taking quick snapshots of your progress. Most people save every 10-15 minutes or after writing a few sentences. This way, if something unexpected happens, you only lose a little bit of work, not everything!
Opening a Document (Finding Your Treasures Again)
Once you've saved your work, you can always open it again later to continue writing or make changes. To open, you'll typically go to the 'File' menu and choose 'Open'. Then you just navigate to where you saved your document, click on its name, and poof! It's back on your screen, ready for more work.
Basic Formatting (Dressing Up Your Words!)
This is where things get fun! Formatting means changing how your text looks to make it more readable, organized, or exciting. Think of it as giving your words different outfits or hairstyles to make them stand out.
- Bold (B): Makes text thicker and darker. Great for emphasizing important words, like IMPORTANT.
- Italic (I): Slants text to the right. Often used for titles of books or for when someone is thinking, like I wonder....
- Underline (U): Puts a line beneath text. Another way to highlight something important, like this phrase.
- Font Type (Font Face): This changes the style of your letters. Just like you can choose different fonts on your phone, you can choose styles like 'Arial', 'Times New Roman', or 'Comic Sans'. Each font has its own personality!
- Font Size: This makes your text bigger or smaller. You can make a heading huge (like
This!
) or tiny for a caption. Sizes are usually measured in 'points'. - Text Color: Want your words to be blue or red? You can easily change their color to make certain parts pop.
To apply formatting, you usually first select the text you want to change (by clicking and dragging your mouse over it, like highlighting with a marker), and then click the appropriate button in the Ribbon/Menu bar.
Copy, Cut, and Paste (The Digital Scissors and Glue)
These three tools are super powerful for moving and duplicating text without retyping it. Imagine you have a paragraph you want to move from the beginning of your report to the end, or a sentence you want to repeat in a few places.
- Copy (Ctrl+C or Cmd+C): This makes an exact duplicate of the selected text and places it on a secret temporary storage area called the 'clipboard'. The original text stays where it is. Think of it as taking a photocopy.
- Cut (Ctrl+X or Cmd+X): This removes the selected text from its original spot and places it on the clipboard. The original text disappears. This is like cutting something out with scissors.
- Paste (Ctrl+V or Cmd+V): This takes whatever is currently on the clipboard and places a copy of it wherever your cursor is blinking. This is like gluing something down.
The clipboard can only hold one thing at a time, so if you copy something new, it replaces whatever was there before.
Undo and Redo (Your Time Machine Buttons!)
Ever made a mistake and wished you could go back in time? In a word processor, you can!
- Undo (Ctrl+Z or Cmd+Z): This magical button reverses your last action. If you accidentally deleted a whole paragraph, hit Undo, and poof! It's back. It's like turning back a few seconds on a time machine.
- Redo (Ctrl+Y or Cmd+Y): If you undo something and then realize you *actually* wanted to keep that change, Redo will bring it back. It's like going forward in time again.
These buttons are usually found near the top of the word processor window and look like curved arrows.
Conclusion
Word processors are incredibly useful tools that will help you throughout your school years and beyond. By understanding these basics – how to type, save, open, format, and move text – you're well on your way to becoming a word processing wizard! Keep practicing, and you'll be creating amazing documents in no time.
Keep learning, free
Create a free Syllabax account to unlock practice questions and games for this topic.
Visual Learning Enhanced! 🚀
To help you master this topic, we use Advanced Syllabax AI to generate detailed diagrams and visual models.
Note on Visuals: The AI sometimes makes spelling errors in image labels. Please refer to the lesson text for the correct terminology.