Learning Journey
Watch this topic in 60 seconds
Free preview · Lesson 1
Understanding Adding Images & Shapes to Slides
Welcome to the Wonderful World of Slides!
Hey there, young designers! Imagine you're telling a super cool story or showing off an amazing project to your classmates or family. How do you make it extra special and easy for everyone to understand? You use slides! Think of a slide as a single page in a special digital book, or like a blank canvas waiting for your creative touches. But instead of just words, we can make our slides pop with pictures and cool shapes!
Part 1: Bringing Pictures to Life with Images!
Have you ever looked at a really interesting book with lots of pictures? The pictures help you understand the story better, right? They make it exciting and show you exactly what the words are talking about. On a slide, these pictures are called images. Images can be photographs, drawings, cartoons, or anything visual!
Why Add Images?
- Make it Fun! A slide with just words can sometimes be a bit boring. Images are like adding sprinkles to an ice cream sundae – they make everything more appealing and fun to look at!
- Explain Ideas Clearly: Sometimes, a picture can tell a story better than a hundred words. If you're talking about a lion, showing a picture of a mighty lion is much clearer than just describing it.
- Grab Attention: A great image can instantly catch someone's eye and make them curious about your slide.
- Tell a Story: Images can help you show a sequence of events, like how a caterpillar turns into a butterfly, step by step.
How to Add an Image – It's Like Finding a Treasure!
Adding an image to your slide is super easy, almost like finding a hidden treasure and placing it right where you want it! Most slide programs have an 'Insert' menu at the top. This is like your magic toolbox.
- Click 'Insert': Look for the word 'Insert' usually near the top of your screen and click it.
- Find 'Pictures' or 'Images': Once you click 'Insert', a menu will drop down. Look for options like 'Pictures', 'Images', or 'From File'.
- Choose Your Picture:
- From Your Computer: If you have a picture saved on your computer (maybe one you drew or a photo from your family trip), you can choose 'This Device' or 'From File'. Then, you'll open a window to find your picture, click on it, and then click 'Insert'. Voilà!
- From the Internet: Sometimes, you need a picture you don't have. Many programs let you search for pictures online directly. Just type in what you're looking for (like 'happy puppy' or 'tall tree'), and a bunch of options will appear. Be sure to pick pictures that are safe and appropriate!
Making Your Image Just Right – Resizing and Moving!
Once your image is on the slide, it might not be the perfect size or in the perfect spot. Don't worry, you're the boss!
- Resizing (Shrink or Grow!): Imagine your image is a piece of playdough. You can stretch it bigger or squish it smaller! When you click on an image, you'll see little squares or circles (called 'handles') around its edges. Click and drag one of these handles (especially the ones in the corners) to make the picture bigger or smaller. Always try to use the corner handles so your picture doesn't get squashed or stretched out of shape!
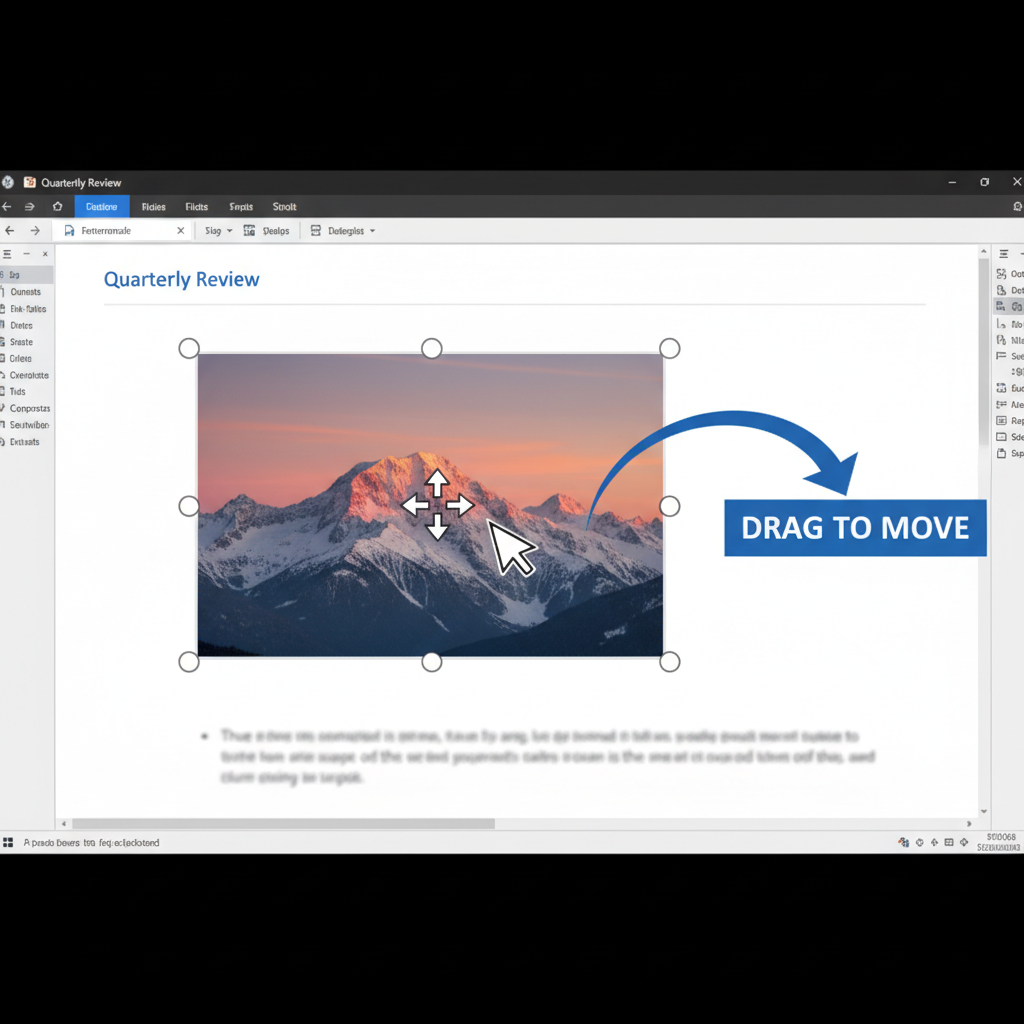
- Moving (Drag and Drop!): Want to move your picture from the left side to the right? It's like picking up a toy and putting it in a different spot. Click on the image (but not on the handles!) and hold down your mouse button. Then, drag the image to where you want it to go, and let go of the mouse button. Easy peasy!
 ⚠️ This picture may have spelling mistakes. Trust the words in the lesson.
Part 2: Designing with Shapes – Your Digital Building Blocks!
Besides pictures, you can also add shapes to your slides! What are shapes? They are those familiar outlines like circles, squares, triangles, arrows, stars, hearts, and many more! Think of them as your digital building blocks or a collection of fancy stickers you can use to decorate and organize your slides.
Why Add Shapes?
- Highlight Important Things: You can draw a circle around a super important word or put a rectangle behind a heading to make it stand out, just like using a highlighter pen!
- Create Diagrams: Shapes are perfect for showing how things connect. You can use squares for steps in a process and arrows to show the direction.
- Organize Information: You can use different shaped boxes to group related ideas together.
- Add Decoration: A few simple shapes can make your slide look neat, professional, and visually appealing. Maybe a star for a 'best idea!'
How to Add a Shape – Pick Your Favorite!
Adding a shape is very similar to adding an image, but instead of finding a picture, you pick from a gallery of ready-made shapes!
- Click 'Insert': Go back to your magic toolbox – the 'Insert' menu.
- Find 'Shapes': In the 'Insert' menu, look for 'Shapes'. When you click it, a big grid of different shapes will appear!
- Choose Your Shape: Click on the shape you want (like a rectangle or an arrow).
- Draw Your Shape: Once you've clicked a shape, your mouse pointer will usually turn into a cross or a plus sign. Click on your slide, hold down the mouse button, and drag to draw the shape to the size you want. Let go of the mouse button when it looks just right!
Making Your Shape Perfect – Resizing, Moving, and Coloring!
Just like images, you're in charge of your shapes!
- Resizing and Moving: These work exactly the same way as with images! Click the shape, use the corner handles to resize, or click and drag the middle of the shape to move it around.
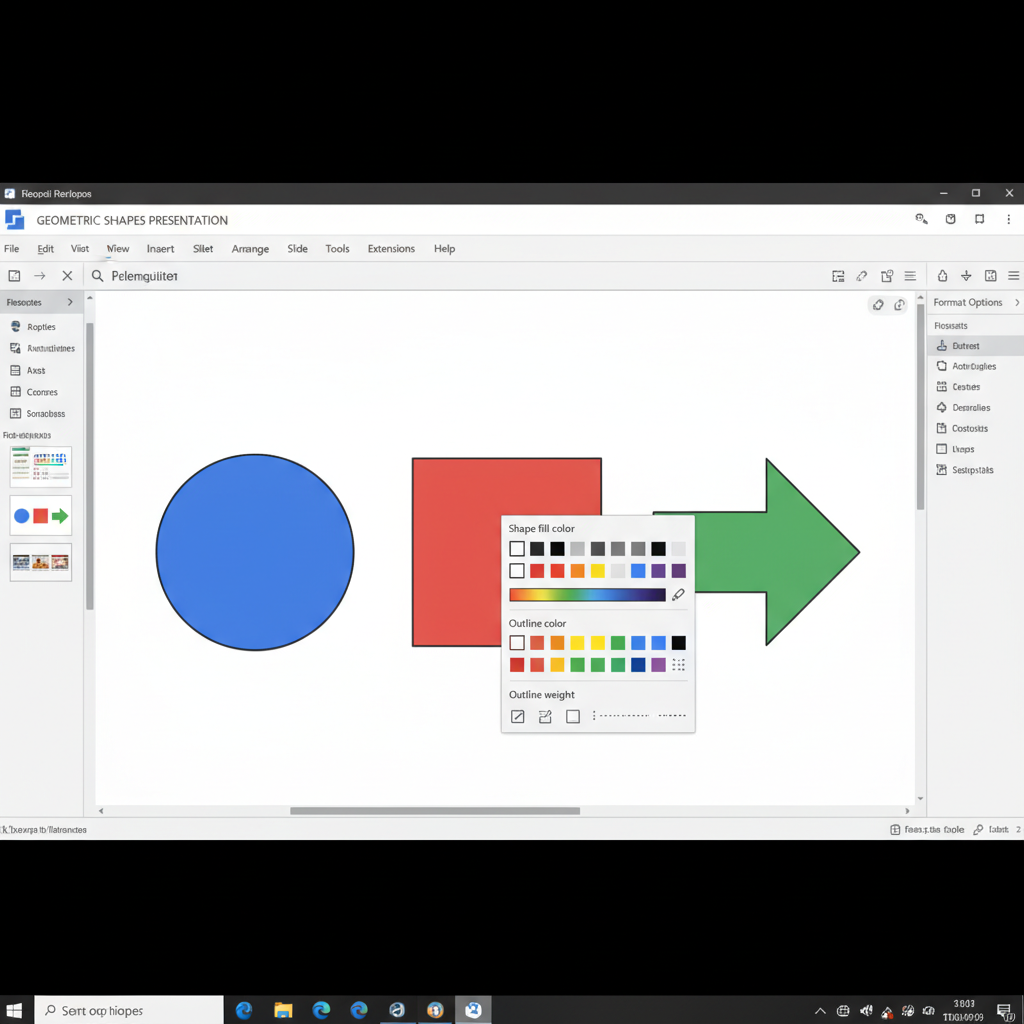
- Changing Color (Fill and Outline!): This is where shapes get really fun! It's like coloring in a drawing. When you click on a shape, special tools usually appear, often called 'Shape Format' or 'Drawing Tools'.
- Fill Color: This is the color *inside* the shape, like filling it with paint. Look for a paint bucket icon or 'Shape Fill' and pick your favorite color!
- Outline Color: This is the color of the line *around* the edge of the shape. Look for a pen icon or 'Shape Outline'. You can also change how thick the line is!
 ⚠️ This picture may have spelling mistakes. Trust the words in the lesson.
Putting It All Together!
Imagine you're making a slide about your favorite animal, a tiger! You can:
- Insert an image of a beautiful tiger.
- Add a rectangle shape behind the tiger's name to make it look like a cool name tag.
- Use an arrow shape to point from the tiger's picture to a fun fact about tigers.
By using both images and shapes, you can create slides that are not just informative but also super creative and engaging!
Remember, your slides are your canvas, and images and shapes are your paintbrushes and stickers. Experiment, have fun, and make your presentations shine!
Keep learning, free
Create a free Syllabax account to unlock practice questions and games for this topic.
Visual Learning Enhanced! 🚀
To help you master this topic, we use Advanced Syllabax AI to generate detailed diagrams and visual models.
Note on Visuals: The AI sometimes makes spelling errors in image labels. Please refer to the lesson text for the correct terminology.