Inserting Pictures in Documents
Watch this topic in 60 seconds
Free preview · Lesson 1
Understanding Inserting Pictures in Documents
Picture Perfect Documents: Your Guide to Adding Photos!
Hello, super learners! Have you ever wanted to make your stories, reports, or birthday invitations extra special? Imagine you're telling a super cool story about your summer vacation. You can talk about the giant sandcastle you built, but wouldn't it be even better if you could show a picture of it right there, next to your words? That's exactly what inserting pictures into documents is all about!
Think of your document like a special scrapbook. Right now, it's full of wonderful words. But sometimes, words aren't enough to tell the whole story, are they? Just like sprinkles make a cupcake even more exciting, pictures make your documents brighter, clearer, and much more fun!
What is a Document, Anyway?
Before we jump into adding pictures, let's quickly remember what a 'document' is. A document is like a digital piece of paper where you write down your ideas, stories, or homework. You might use programs like Microsoft Word, Google Docs, or other similar tools to create them. These programs are like your magic writing pads!
What Does "Inserting" Mean?
To 'insert' something just means to put it into something else. It's like when you add a sticker to your sticker book, or when you put a puzzle piece into its right spot. You're inserting it! In our case, we're going to insert a picture into our document.
Why Add Pictures? (The Superpowers of Pictures!)
Pictures are like silent storytellers. They can show what words can only describe. They make your reports more interesting, your stories more colorful, and your projects easier to understand. If you're writing about animals, a picture of a lion is much more exciting than just the word 'lion'!
Analogy: Words are like ingredients in a recipe, and pictures are like the amazing photo of the finished dish on the cookbook cover. Both are important, but the picture really makes you want to try it!
How Do We Do It? Your Step-by-Step Guide!
Step 1: Open Your Magic Writing Pad (Your Document Program)
First things first, you need to open the document where you want to add your picture. If you're using a computer, you'd open up a program like Microsoft Word or Google Docs. It's like opening your sketchbook before you start drawing.
Step 2: Find the 'Insert' Button (The Special 'Add-On' Tool)
Look at the top of your program's screen. You'll usually see a menu bar with words like 'File,' 'Home,' 'Insert,' 'Design,' and so on. We're looking for the word 'Insert.' Think of 'Insert' as the special button that lets you add new things to your document, like stickers or special effects in a game.
Click on the 'Insert' tab.
Step 3: Choose 'Picture' or 'Image' (Picking Your Treasure!)
Once you click 'Insert,' a list of options will appear. You'll see things like 'Table,' 'Shapes,' and 'Pictures' (or 'Images'). You want to click on 'Pictures' or 'Images.' This tells the computer, 'Hey! I want to add a photo here!'
Step 4: Where is Your Picture Hiding? (Like Finding a Toy in Your Room!)
After you click 'Pictures,' a new window will pop up. This window is like a map of your computer, showing you all the folders and files where your pictures might be saved. You might have pictures in a folder called 'Downloads,' 'Pictures,' or maybe on your 'Desktop.'
You need to navigate (that means 'move around') through these folders to find the picture you want to add. It's like looking for your favorite toy in your toy box – you know it's in there somewhere, you just have to find it! You can choose pictures from your own computer, or sometimes you can even search for pictures online directly from the document program. But for now, let's focus on pictures already saved on your computer.
Step 5: Select Your Picture and Click 'Insert' (The Magic Moment!)
Once you've found the picture you want, click on it once with your mouse. It will usually get a blue highlight around it, like saying, 'Yes, this is the one!' Then, look for a button that says 'Insert' or 'Open' at the bottom of that window and click it.
Voila! Just like magic, your picture will appear in your document! It's like carefully placing your chosen sticker onto a page in your sticker book.
What Happens After You Insert the Picture? (Making it Just Right!)
Moving Your Picture (Sliding it Around)
Sometimes, when you insert a picture, it might not land exactly where you want it. That's okay! You can move it around. Think of it like a piece of paper you can slide across your desk.
Usually, you click on the picture once, and then you can click and hold your mouse button down on the picture, and drag it to a new spot. It might take a little practice, but soon you'll be a pro! Some programs might require you to set the 'Text Wrapping' option (like 'Square' or 'Tight') to make it easier to move freely.
Resizing Your Picture (Making it Bigger or Smaller)
What if your picture is too big and takes up the whole page? Or too tiny to see clearly? No problem! You can change its size.
When you click on a picture, you'll see little circles or squares appear around its edges, especially in the corners. These are like 'handles.' If you click and drag one of these corner handles, you can make the picture bigger or smaller. It's like stretching or shrinking a piece of play-doh!
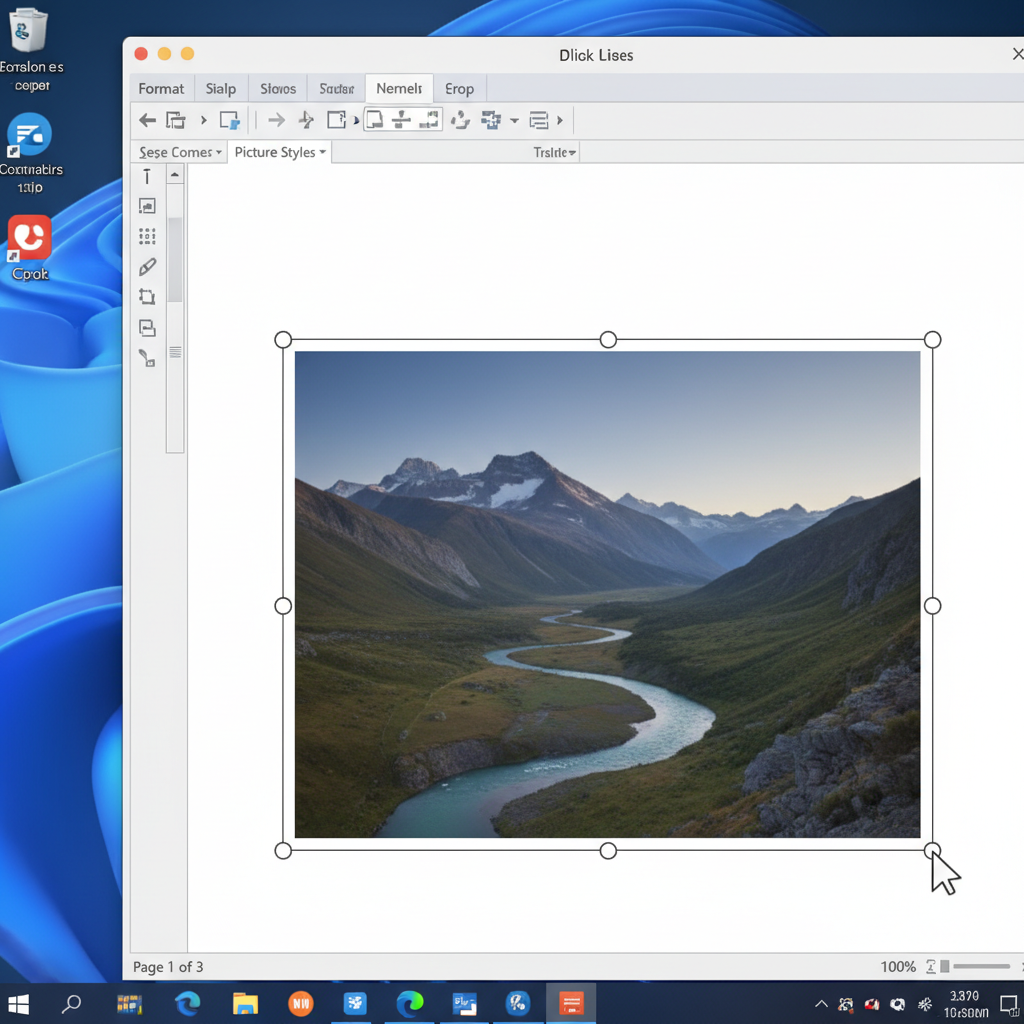 ⚠️ This picture may have spelling mistakes. Trust the words in the lesson.
Important Tip: Always try to use the corner handles. If you use the handles on the sides (not the corners), your picture might look squished or stretched out of shape, like a funhouse mirror! The corner handles keep your picture looking just right.
Why is This Skill Important? (More Than Just Fun!)
Learning to insert pictures is a super useful skill! It helps you make:
- Amazing School Projects: Imagine a science report with diagrams and photos!
- Fun Stories: Show your characters or settings, making your reader feel like they're right there.
- Cool Invitations: Add pictures to birthday invites or party flyers to make them stand out.
- Informative Presentations: Help your audience understand your topic better with clear images.
Analogy: It's like having a superpower that makes your words come alive and helps you share your ideas even better!
Time to Practice!
So remember, adding pictures is all about finding the 'Insert' button, choosing 'Pictures,' locating your photo, and then clicking 'Insert.' And don't forget you can move and resize them too! Now go ahead and make your documents picture perfect!
Keep learning, free
Create a free Syllabax account to unlock practice questions and games for this topic.
Visual Learning Enhanced! 🚀
To help you master this topic, we use Advanced Syllabax AI to generate detailed diagrams and visual models.
Note on Visuals: The AI sometimes makes spelling errors in image labels. Please refer to the lesson text for the correct terminology.