Word Processing Basics (e.g., Google Docs)
Watch this topic in 60 seconds
Free preview · Lesson 1
Understanding Word Processing Basics (e.g., Google Docs)
Welcome to the Wonderful World of Word Processing!
Hey there, future digital writers! Get ready to explore a super cool tool that will change the way you write forever. Imagine you have a magical notebook that never runs out of pages, automatically saves your work, lets you fix mistakes without erasing, and even helps you share your stories with friends! That’s exactly what word processing is all about!
What is Word Processing? It's Like a Digital Typewriter!
Think about how people used to write long ago. They had a pen and paper, or maybe a bulky machine called a "typewriter" that made clack-clack sounds. If they made a mistake, they had to erase carefully or even start all over! Word processing is like having a super-duper modern typewriter right on your computer or tablet, but way better.
Instead of paper, you type on a screen. Instead of ink, your words are made of pixels. And the best part? You can change anything, anytime, without making a mess!
Why Use a Word Processor? So Many Reasons!
- Neat & Tidy: All your words look perfectly typed, no messy handwriting!
- Easy to Fix: Made a spelling mistake? No problem! Just backspace and type the correct word. It’s like having an invisible eraser that works perfectly every time.
- Change Your Mind: Want to make a word bigger? Or change its color? Super easy!
- Share & Collaborate: You can instantly share your stories, poems, or reports with your teacher, friends, or family. You can even work on a project together with a friend, even if you’re in different houses!
- Never Lose Your Work: Most word processors save your work automatically. It’s like having a super-smart assistant who constantly puts your papers in a safe folder for you.
Our Magical Tool: Google Docs (A Cloud Superpower!)
There are many different word processing programs, but one of the most popular and easiest to use is called Google Docs. It’s like a special kind of word processor because it lives "in the cloud."
What does "in the cloud" mean? Imagine you have a magical backpack. Everything you put in that backpack isn't just in *your* house; it's also instantly available wherever you go, on any device – whether it’s your school computer, your tablet at home, or even a friend's computer (with your permission, of course!). That’s what the cloud is like for your documents. You can access your Google Docs from anywhere with an internet connection, because they're saved safely online, not just on one computer.
Getting Started: Your Digital Workspace
When you open Google Docs, it looks a bit like a blank piece of paper on your screen, but with lots of helpful buttons around it. Let's look at the main parts:
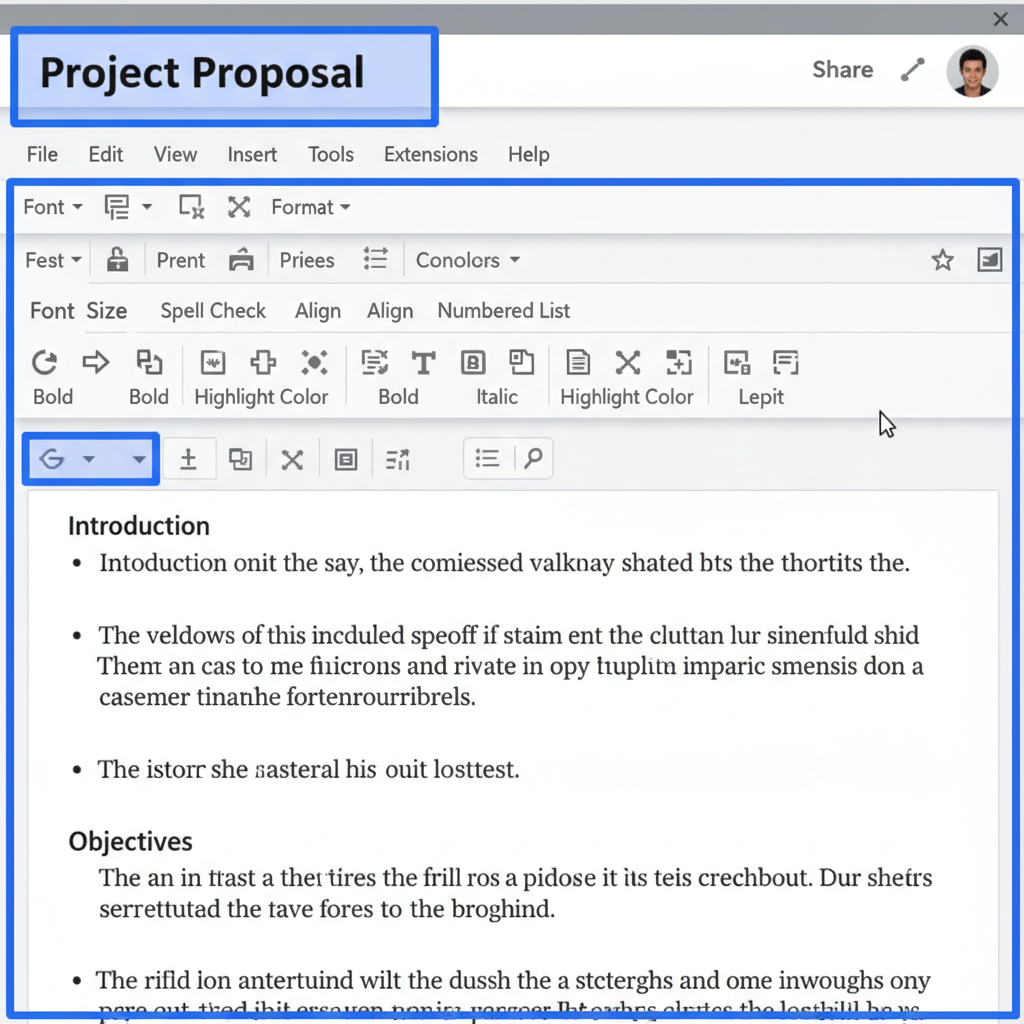 ⚠️ This picture may have spelling mistakes. Trust the words in the lesson.The Title Bar (Your Document's Name Tag): At the very top, you’ll see where it says "Untitled document." This is like the cover of your book or the name tag for your school project. Click on it and type a new, descriptive name so you can easily find your work later, like "My Awesome Story" or "Science Report on Frogs."
- The Menu Bar (Your Grand Toolbox): Just below the title, you’ll see words like "File," "Edit," "View," "Insert," "Format," "Tools," and "Help." This is like your main toolbox, holding all the big categories of actions you can do. If you want to open a new document, save a copy, or insert a special item, you'll often start here.
- The Toolbar (Your Quick Buttons): Underneath the menu bar is a row of little pictures and buttons. This is like your quick-access toolbox for things you use all the time! We’ll learn about many of these soon, like making words bold or changing their color.
- The Typing Area (Your Blank Page): This is the biggest part of the screen, the large white space. This is where your words will appear as you type. It’s your digital paper!
Core Concepts: The Building Blocks of Your Documents
1. Typing Away!
Just like typing on a keyboard for games or messages, you simply start typing! The blinking vertical line (it's called the "cursor") shows you exactly where the next letter will appear. Use the "Backspace" key to erase mistakes and the "Enter" key to start a new paragraph (like pressing the return key on a typewriter).
2. Automatic Saving (Your Super-Smart Assistant)
One of the best things about Google Docs is that it saves your work automatically, all the time! You don't have to remember to click a "Save" button. It's like having that super-smart assistant constantly putting your work away safely in your magical cloud backpack.
3. Making Your Words Look Special (Formatting Text)
This is where you can make your words really stand out! To change how a word or sentence looks, you first need to "select" it. Think of selecting as highlighting with a magical highlighter. Click your mouse at the beginning of the word, hold the button down, and drag it across the word (or words) you want to change, then let go. The selected text will turn blue.
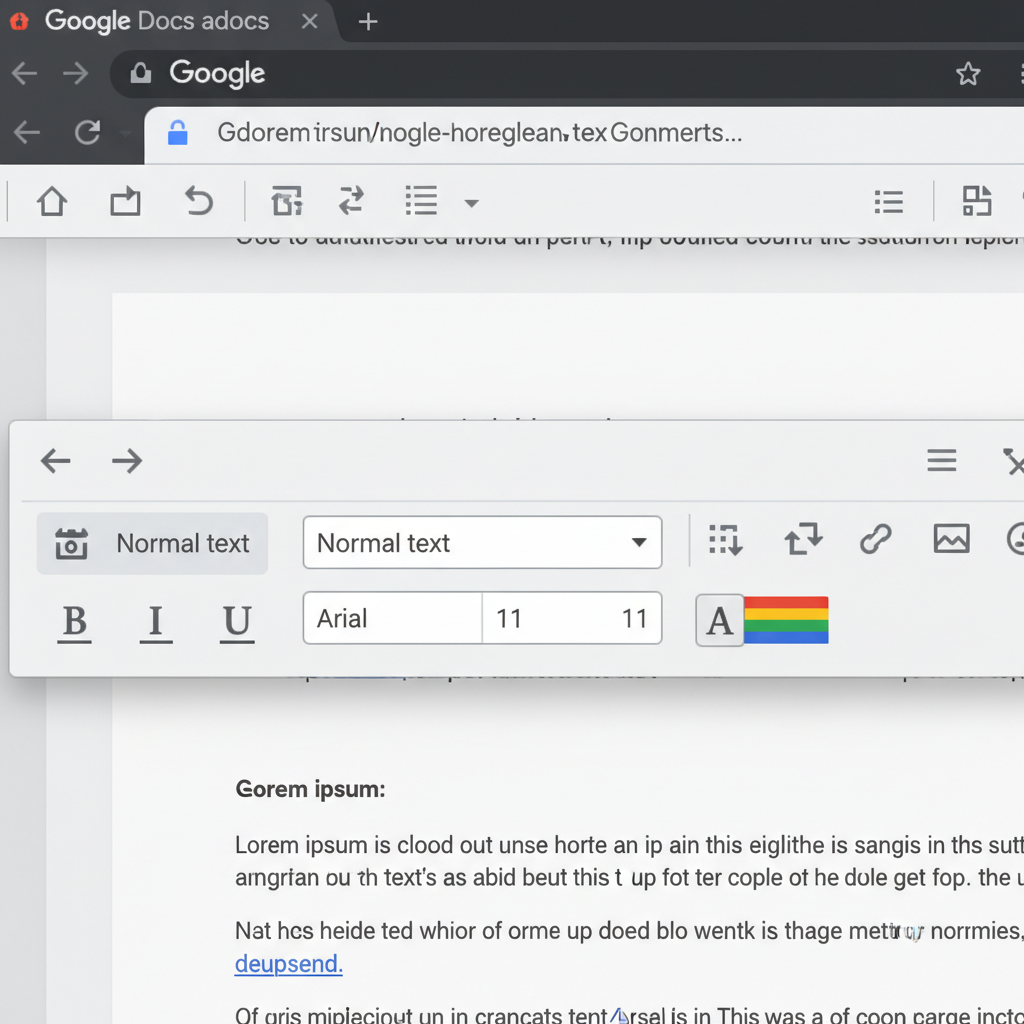 ⚠️ This picture may have spelling mistakes. Trust the words in the lesson.Once selected, look at your toolbar for these magical buttons:
- Bold (B): Makes words thicker and darker. It’s like shouting your words or making them super important! "STOP!"
- Italic (I): Makes words lean to the side. It's like whispering or emphasizing something gently. "Isn't that interesting?"
- Underline (U): Draws a line under your words. It’s like marking something important in a textbook. "Remember this!"
- Font (Your Handwriting Style): This button lets you change the "style" of your letters. Do you want them to look like fancy cursive, neat block letters, or something fun and bubbly? This is like picking a different handwriting style for your document. (e.g., Arial, Times New Roman, Comic Sans).
- Font Size (How Big or Small): This number lets you make your letters bigger or smaller. Just like you can write in tiny letters or giant letters, you can do the same here!
- Text Color (Your Pen Color): Want to write in red, blue, or green? This button lets you change the color of your words, just like picking a different colored pen.
4. Copy, Cut, and Paste (The Duplicating and Moving Magic)
These are super handy tools for moving or copying text and pictures around!
- Copy (Ctrl+C or Command+C): Makes an exact duplicate of selected text or images. It's like using a copy machine to make an extra version of something without taking the original away.
- Cut (Ctrl+X or Command+X): Removes selected text or images from where they are. Think of it like using scissors to cut a picture out of a magazine – it's gone from the original spot.
- Paste (Ctrl+V or Command+V): Puts the copied or cut item into a new spot. After you "Copy" or "Cut," the item goes into a special invisible clipboard. "Paste" takes it from there and puts it wherever your cursor is blinking. It’s like gluing that cut-out picture into a new scrapbook page.
5. Undo and Redo (The Time Travel Buttons!)
Made a mistake? Deleted something by accident? Don't panic!
- Undo (Curvy arrow pointing left): This is your magic rewind button! It takes back your last action. If you accidentally deleted a paragraph, just click Undo, and it reappears!
- Redo (Curvy arrow pointing right): If you "Undid" too much, "Redo" will bring back the action you just undid. It's like fast-forwarding after a rewind.
6. Inserting Images (Your Digital Scrapbook)
Documents aren't just for words! You can add pictures too. Go to the "Insert" menu (in your grand toolbox), then choose "Image." You can upload a picture from your computer or even search for one online. It’s like gluing a photo into your digital scrapbook to make your story more interesting!
7. Sharing Your Masterpiece (Lending Your Notebook)
The "Share" button (usually in the top right corner) is like lending your special notebook to a friend or showing your teacher your amazing work. You can choose to let them just "view" your document (they can read it but not change it) or "edit" it (they can help you type and make changes, great for group projects!).
Keep Exploring!
This is just the beginning of your adventure with word processing! The best way to learn is to practice. Open Google Docs, type anything you want, and try out all these buttons. You’ll be a word processing wizard in no time!
Keep learning, free
Create a free Syllabax account to unlock practice questions and games for this topic.
Visual Learning Enhanced! 🚀
To help you master this topic, we use Advanced Syllabax AI to generate detailed diagrams and visual models.
Note on Visuals: The AI sometimes makes spelling errors in image labels. Please refer to the lesson text for the correct terminology.