Presentation Software Basics (e.g., Google Slides)
Watch this topic in 60 seconds
Free preview · Lesson 1
Understanding Presentation Software Basics (e.g., Google Slides)
Welcome to the Wonderful World of Presentation Software!
Hey there, future storytellers and super presenters! Have you ever wanted to share an idea, tell a story, or teach your friends something cool, but felt like just talking wasn't enough? Maybe you wished you had big pictures, exciting words, and a way to show everything clearly? Well, guess what? There's a fantastic tool that helps you do exactly that! It's called Presentation Software, and today we're going to learn all about its super cool basics.
What is a Presentation? (It's Like Telling a Story with Pictures!)
Imagine you have an amazing story to tell. You could just say the words, right? But wouldn't it be even better if you had pictures to show what you're talking about? Maybe a map for an adventure story, or a drawing of a funny character? That's what a presentation is! It's a way to share information, ideas, or stories using a mix of words and pictures, usually on a screen for everyone to see.
Think of it like a digital version of a show-and-tell, but way cooler and more organized! Instead of holding up one thing at a time, you can show a whole series of ideas, one after the other, to explain your topic perfectly.
What is Presentation Software? (Your Digital Storytelling Studio!)
Now, how do we make these awesome digital show-and-tells? We use Presentation Software! This is a special computer program that helps you create and organize your presentations. It gives you all the tools you need to put together words, pictures, and even videos onto digital pages.
One very popular and easy-to-use presentation software is Google Slides. It's like your own personal digital art studio where you can design your ideas and bring them to life on the screen. Other famous ones include Microsoft PowerPoint and Apple Keynote, but they all do a similar job: helping you tell your story visually!
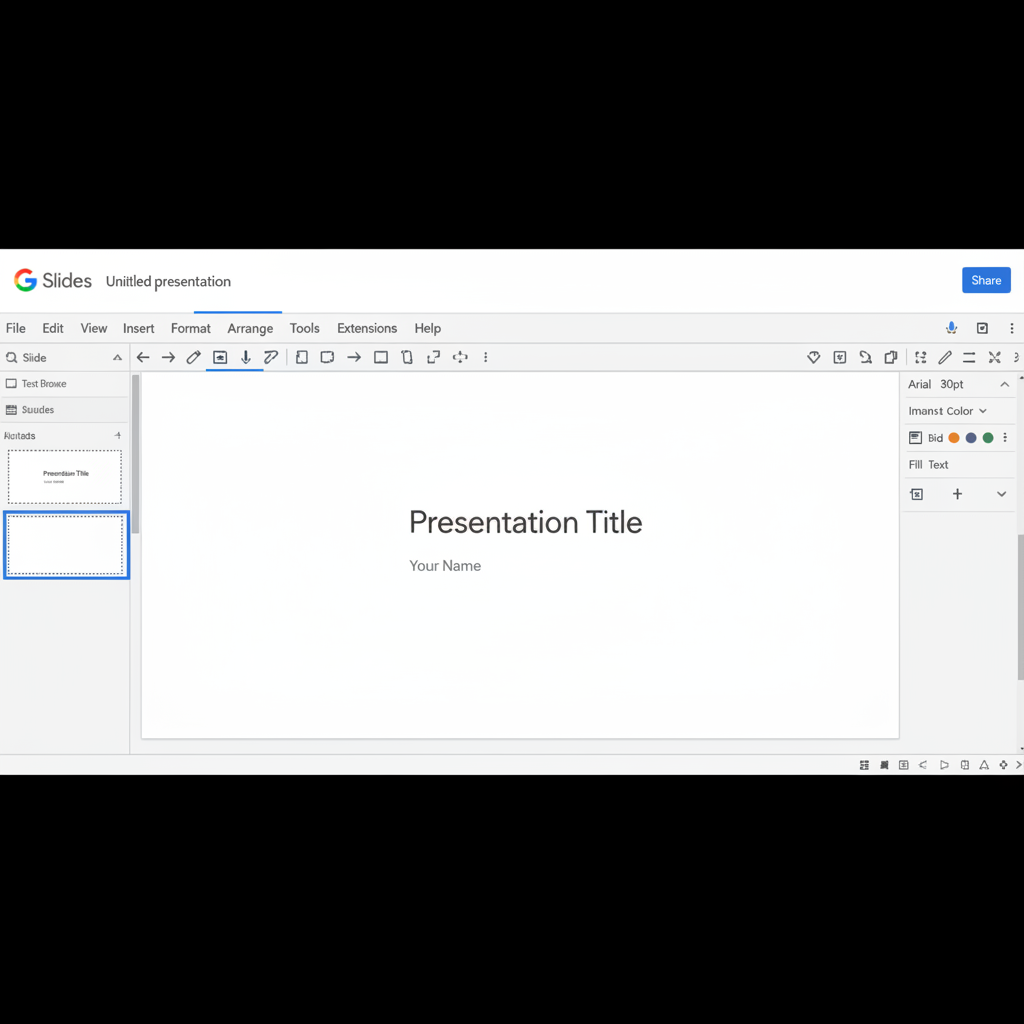 ⚠️ This picture may have spelling mistakes. Trust the words in the lesson.
The Building Blocks of Your Presentation: Core Concepts!
Just like a house is built with bricks and wood, your presentation is built with a few key parts. Let's explore them:
1. Slides: The Pages of Your Digital Storybook
Think of a presentation as a book. Each page in that book is called a Slide. When you open presentation software, you'll usually start with one blank slide. You can add more and more slides to tell your whole story, one idea at a time. Each slide focuses on a different part of your topic.
- Analogy: Slides are like the flashcards you use to study, or the different scenes in a play. Each one gives you new information or shows a new part of your idea.
2. Text Boxes: Where Your Words Live
When you want to write words on your slide, you use a Text Box. It's like a special invisible box where you can type your sentences, change their size, color, and even their style. You can move these boxes around your slide to place your words exactly where you want them.
- Analogy: A text box is like a sticky note you can write on and stick anywhere on your slide. Or imagine it's a speech bubble for your ideas!
3. Images: Pictures Speak a Thousand Words!
Want to show a picture of a dinosaur, a faraway planet, or your pet cat? You'll add an Image! Images make your presentation much more interesting and easier to understand. You can upload pictures from your computer, or even search for them right inside the software.
- Analogy: Images are like the photos in your family album or the drawings in a comic book. They help tell the story without needing too many words.
4. Themes & Templates: Giving Your Presentation a Style!
Ever wish your presentation could have a fancy background or a cool font without you having to design everything yourself? That's where Themes (or Templates) come in! A theme is a ready-made design that includes colors, fonts, and backgrounds that all go together nicely. It gives your whole presentation a professional and polished look instantly.
- Analogy: A theme is like choosing a ready-made outfit for your presentation. You pick one, and all the slides magically match with a consistent style!
5. Layouts: Arranging Things on Your Slide
Once you have a slide, how do you decide where the title goes, or where the pictures should be? That's where Layouts help! A layout is a pre-set arrangement of text boxes and image placeholders on a slide. For example, one layout might have a big title at the top and two boxes below for text, while another might have a title and a large space for an image.
- Analogy: Layouts are like different room arrangements. You can choose a layout that has space for a big bed and a desk, or one that has two smaller beds. It helps you organize your slide content neatly.
Let's Make a Simple Presentation: Your First Steps!
Now that you know the basic parts, let's talk about how to start building your very own presentation:
Step 1: Open the Software and Pick a Theme
First, you open Google Slides (or another presentation software). It will usually ask you if you want to start a 'Blank Presentation' or choose a 'Template'. Choosing a template or theme is a great way to start because it gives your presentation a nice look right away!
Step 2: Add Your First Title
Your first slide is usually a 'Title Slide'. Click on the text boxes that say "Click to add title" or "Click to add subtitle" and type in the name of your presentation and your name. Make it catchy!
Step 3: Add New Slides for More Ideas
To tell more of your story, you'll need more pages! Look for a button that says "+ New Slide" or a similar icon (it often looks like a plus sign on a piece of paper). Click it to add a new slide. You can then choose a layout for this new slide.
Step 4: Type Your Text
On your new slides, use the text boxes to type out your main ideas, facts, or story parts. Remember to keep your sentences clear and not too long!
Step 5: Insert Pictures (Make it Pop!)
Pictures make everything better! Look for an "Insert Image" button (often looks like a little mountain or landscape icon). You can then choose to upload a picture from your computer, search online, or even use your camera.
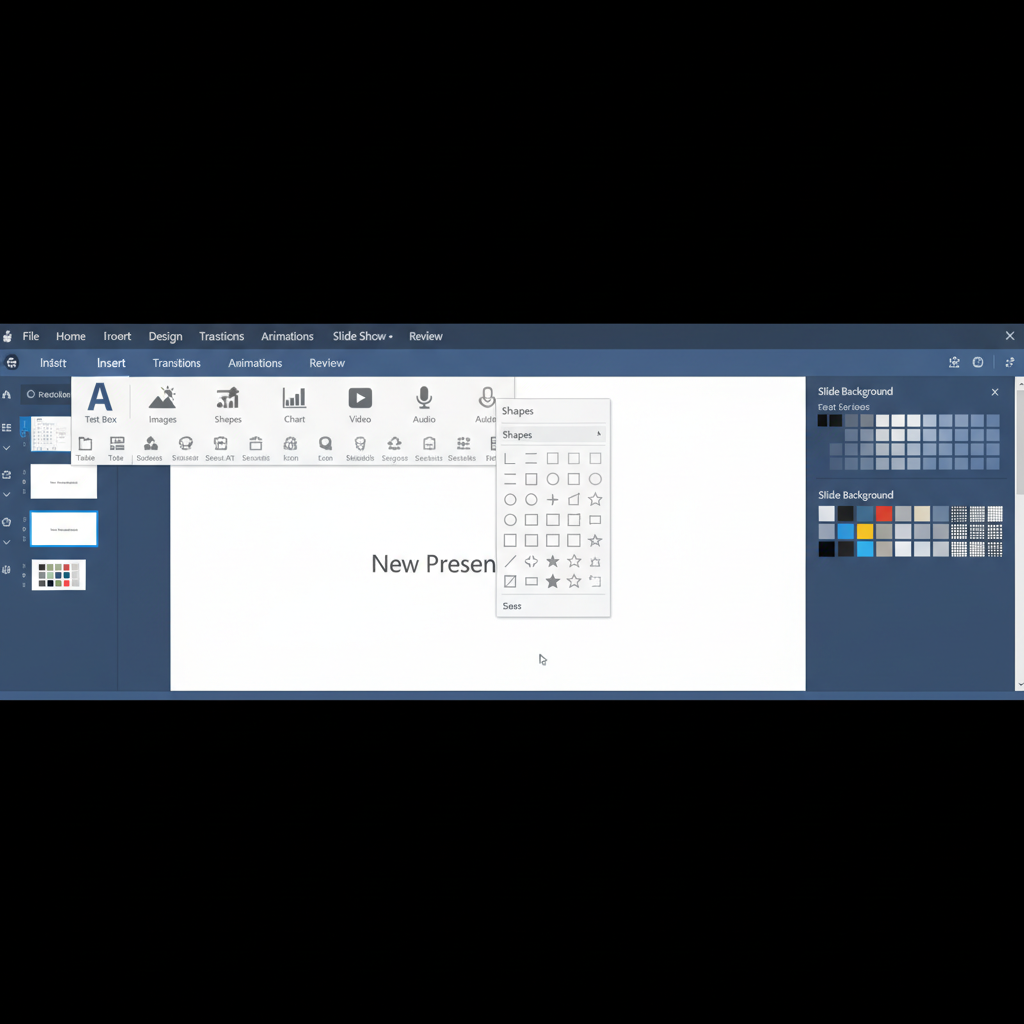 ⚠️ This picture may have spelling mistakes. Trust the words in the lesson.
Step 6: Practice and Present!
Once you've added all your slides, text, and pictures, it's time to practice! Go through your presentation and imagine you're talking to an audience. When you're ready, look for a "Present" or "Start Slideshow" button (often a play icon) to show your amazing work full screen!
Why is Presentation Software So Useful?
- It helps you organize your thoughts: Breaking your ideas into slides makes them easier to understand.
- It makes learning fun: Pictures and different designs keep people engaged.
- You can share your ideas with many people: Projecting your presentation on a big screen means everyone can see!
- It's a creative outlet: You get to choose colors, fonts, and images to make your presentation unique.
Quick Tips for Awesome Presentations (for 5th Graders!):
- Keep it Simple: Don't put too many words on one slide. Use bullet points!
- Big and Clear Fonts: Make sure everyone can read your text easily.
- Choose Bright Colors: But don't use too many different colors on one slide.
- Use Good Pictures: Pictures that relate to your topic make it more interesting.
- Practice, Practice, Practice!: The more you practice, the more confident you'll feel when you present.
You've taken your first big step into becoming a presentation pro! With tools like Google Slides, you can create amazing visual stories and share your knowledge with the world. Keep practicing, keep exploring, and most importantly, have fun with it!
Keep learning, free
Create a free Syllabax account to unlock practice questions and games for this topic.
Visual Learning Enhanced! 🚀
To help you master this topic, we use Advanced Syllabax AI to generate detailed diagrams and visual models.
Note on Visuals: The AI sometimes makes spelling errors in image labels. Please refer to the lesson text for the correct terminology.