Learning Journey
Free preview · Lesson 1
Understanding Division of line segment (Constructions)
Dividing a Line Segment: The Art of Fair Sharing (Foundational Construction)
Welcome, 10th-grade learners! Today, we're going to explore a fundamental concept in geometry: how to divide a line segment into specific parts using only a compass and a ruler. This might sound like a magic trick, but it's a very practical skill with applications in everything from art and design to engineering. Think of it as learning how to cut a cake perfectly into unequal but proportional slices without needing a calculator, just your trusty tools!
What is a Line Segment?
First things first, what exactly are we dividing? A line segment is simply a part of a line that has two distinct endpoints. Imagine a piece of string cut from a longer roll – it has a definite beginning and an end. That's a line segment!
Why Divide a Line Segment? The Concept of Ratio
Why would we want to divide a line segment? Sometimes, we don't want to cut something exactly in half. Maybe you're an artist sketching a human figure, and you know the head should be one part, and the body should be seven parts – a 1:7 ratio. Or perhaps you're a designer planning a garden path, and you want the paved section to be twice as long as the gravel section – a 2:1 ratio. This idea of 'how many times one part fits into another' is called a ratio.
When we talk about dividing a line segment in a ratio like 'm:n', it means we want to break it into two pieces such that the length of the first piece is 'm' times some unit, and the length of the second piece is 'n' times the same unit. For example, dividing a line segment in the ratio 2:3 means we're creating five total parts (2 + 3 = 5), where the first piece takes up two of these parts and the second piece takes up three.
The Essential Tools for Our Geometric Adventure
Before we embark on our construction journey, let's gather our simple yet powerful tools:
- A Pencil: For drawing clear lines and arcs.
- A Ruler (or Straightedge): To draw straight lines. We won't use its measurement markings for this specific construction, just its straight edge!
- A Compass: This magical tool helps us draw circles and, more importantly for today, transfer exact distances. Think of it like a pair of dividers to make sure your 'slices' are equal.
Step-by-Step Construction: Dividing a Line Segment in a Given Ratio (m:n)
Let's imagine we have a line segment AB, and we want to divide it in the ratio m:n (for example, 3:2). This means we want to find a point P on AB such that AP : PB = m : n. The total number of equal parts we need to create is m + n (in our example, 3 + 2 = 5 parts).
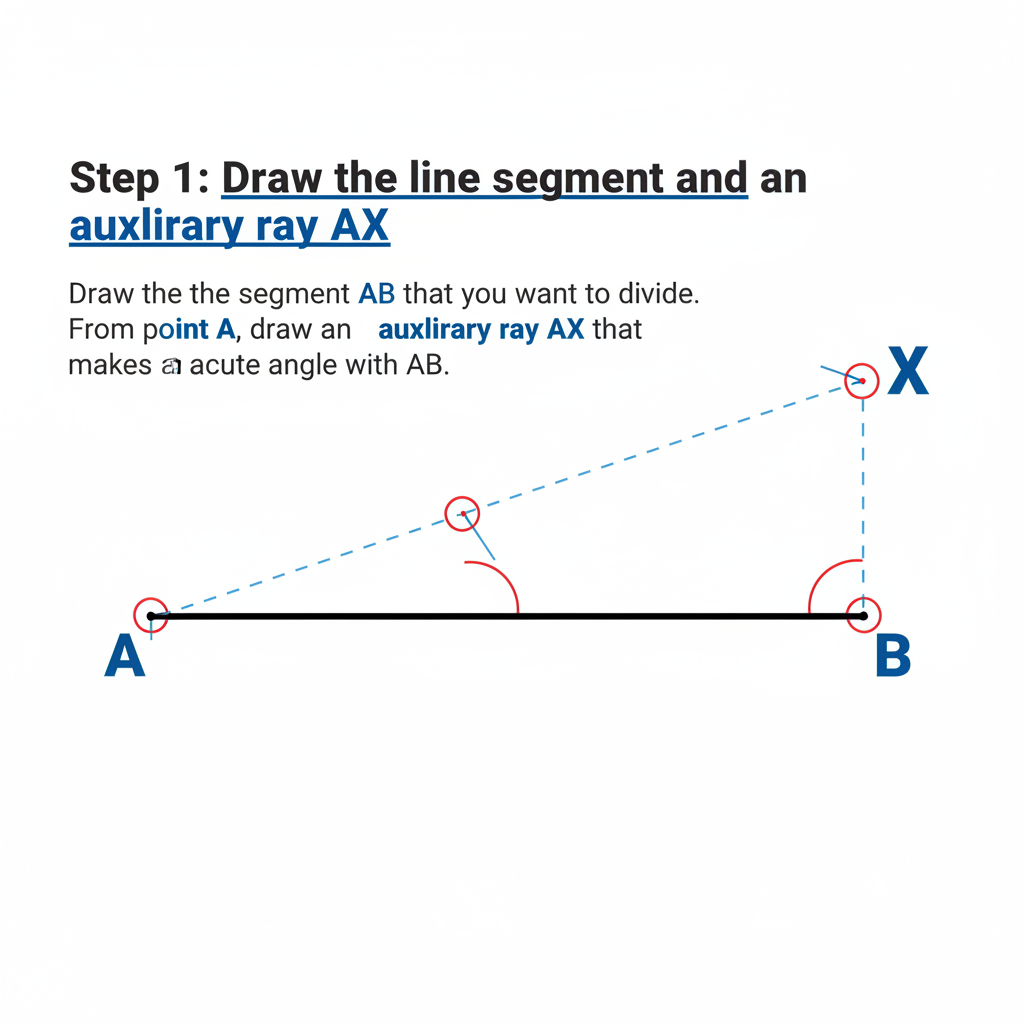
Step 1: Draw Your Main Line Segment
First, draw the line segment AB that you wish to divide. Use your pencil and ruler for a clear, straight line.
Step 2: Create a Helper Line (Auxiliary Ray)
From point A, draw a ray AX such that angle BAX is an acute angle (an angle less than 90 degrees). Think of this as drawing a helper path, or a 'guide rail,' extending from one end of your main line. It shouldn't be too steep or too flat; just a comfortable angle.
Step 3: Mark Equal Divisions on Your Helper Line
Now, this is where your compass comes in handy! We need to make m + n (in our example, 3 + 2 = 5) equal markings on ray AX. Let's call these points A1, A2, A3, A4, A5.
- Set your compass to a convenient radius (not too small, not too large).
- With A as the center, draw an arc intersecting AX at A1.
- Now, with A1 as the center and the same radius, draw another arc intersecting AX at A2.
- Repeat this process until you have marked A1, A2, ..., A(m+n). In our 3:2 example, you'd mark A1, A2, A3, A4, A5. Each segment (AA1, A1A2, etc.) is of equal length, thanks to your compass!
Step 4: Connect the Endpoints
Using your ruler, draw a straight line connecting the last point on your helper line, A(m+n) (which is A5 in our example), to the endpoint B of your original line segment AB. This line, A(m+n)B, is crucial; it sets the slope for our final division.
 ⚠️ This picture may have spelling mistakes. Trust the words in the lesson.
Step 5: The Magic of Parallel Lines
This is the clever part! We need to draw a line parallel to A(m+n)B, passing through the point Am on the ray AX. In our 3:2 example, 'm' is 3, so we need to draw a parallel line through A3.
How do we draw a parallel line using just a compass and ruler?
- Place the compass point at A(m+n) (A5 in our example) and draw an arc that intersects both AX and the line A(m+n)B.
- Without changing the compass radius, place the compass point at Am (A3 in our example) and draw a similar arc that intersects AX.
- Now, measure the width of the first arc (the distance between where it crossed AX and where it crossed A(m+n)B). Place your compass point at the intersection of the second arc and AX, and mark this same width on the second arc.
- Finally, draw a straight line from Am (A3) through this new mark you just made. This line will be parallel to A(m+n)B and will intersect the original line segment AB at a point P.
And there you have it! Point P divides the line segment AB in the ratio m:n (3:2 in our example). AP will be three parts long, and PB will be two parts long.
Why Does This Work? (A Peek Ahead)
This construction works because of a powerful geometric theorem called the Basic Proportionality Theorem (also known as Thales' Theorem or the Intercept Theorem). In simple terms, it states that if a line parallel to one side of a triangle intersects the other two sides, then it divides the two sides proportionally. Our construction effectively creates a triangle (ABA(m+n)) and then a parallel line (AmP) within it, ensuring the correct division.
Recap and Practice Tips
The key to mastering this construction is practice. Go through the steps a few times with different ratios (like 1:1 for a midpoint, or 1:3, or 4:1). Always use a sharp pencil and be precise with your compass arcs and ruler lines. With a little patience, you'll be dividing line segments like a pro!
Keep learning, free
Create a free Syllabax account to unlock practice questions and games for this topic.
Visual Learning Enhanced! 🚀
To help you master this topic, we use Advanced Syllabax AI to generate detailed diagrams and visual models.
Note on Visuals: The AI sometimes makes spelling errors in image labels. Please refer to the lesson text for the correct terminology.