Construction of quadrilaterals (advanced) (Constructions)
Watch this topic in 60 seconds
Free preview · Lesson 1
Understanding Construction of quadrilaterals (advanced) (Constructions)
Construction of Quadrilaterals: Building Blocks for Shapes (Grade 9, Foundational)
Imagine you're an architect, but instead of giant buildings, you're designing miniature shapes on paper. To do this perfectly, you need to know how to 'construct' them using only a few basic tools. This guide will walk you through the foundational concepts of constructing quadrilaterals, which are simply four-sided polygons. Think of it like learning to build with LEGOs – you start with simple bricks and learn how to snap them together to make more complex structures.
What is Geometric Construction?
Geometric construction, in mathematics, means drawing geometric shapes, angles, and lines accurately using only a compass and an ungraduated straightedge (a ruler without markings, used only to draw straight lines, not to measure). It's a bit like being a chef who can only use certain utensils. We don't rely on measuring with a ruler or protractor directly, but rather on the principles of geometry to make precise drawings.
Our Essential Toolkit:
- Compass: This is your 'arc maker' or 'circle drawer'. It helps you transfer lengths and find points that are a certain distance from another point. Think of it as a specialized measuring tape that also draws curves.
- Straightedge (Ruler): This is your 'line drawer'. It helps you draw perfectly straight lines connecting two points. It's like a laser beam for straight lines.
- Pencil: Your writing tool!
Review of Basic Constructions: Your Foundational LEGO Bricks
Before we build quadrilaterals, we need to master some fundamental constructions. These are the 'basic bricks' you'll use over and over again:
- Constructing a Line Segment of a Given Length: This is simply using your straightedge to draw a line and your compass to mark off the exact length.
- Constructing an Angle (e.g., 60°, 90°): This involves using the compass to create arcs that define specific angles. For example, a 60° angle is formed by an equilateral triangle, and a 90° angle can be constructed using perpendicular lines.
- Bisecting a Line Segment: To 'bisect' means to cut exactly in half. You use your compass to draw arcs from both ends of the segment; where they intersect helps you draw a line right through the middle, perpendicular to the original segment. Imagine folding a piece of paper exactly in half.
- Bisecting an Angle: Similar to bisecting a line, you use your compass to draw arcs that help you draw a line that cuts an angle into two identical smaller angles. Think of it as splitting a slice of pizza perfectly down the middle.
- Constructing Perpendicular Lines: These are lines that meet at a perfect 90° angle. A common method is constructing a perpendicular bisector, or drawing a line perpendicular to another line from a point on or off the line.
- Constructing Parallel Lines: These are lines that never meet, no matter how far they extend, like two lanes on a straight highway. You can construct them using various angle properties, such as corresponding angles or alternate interior angles.
Understanding Quadrilaterals: The Blueprints
Each type of quadrilateral is like a different kind of house, with its own unique blueprint and features. To construct them, you need to know their defining properties. For foundational understanding, we'll focus on the most common ones:
-
Parallelogram:
A four-sided figure where opposite sides are parallel and equal in length. Also, opposite angles are equal, and diagonals bisect each other (meaning they cut each other exactly in half). Imagine pushing a rectangle to the side – it becomes a parallelogram.
-
Rectangle:
A special type of parallelogram where all four angles are 90°. Its diagonals are also equal in length. Think of a perfect window frame.
-
Square:
The 'perfect' quadrilateral! It's a special rectangle where all four sides are equal in length. This means all sides are equal, and all angles are 90°. Its diagonals are equal, bisect each other, and are perpendicular (meet at 90°). Like a perfectly symmetrical tile.
-
Rhombus:
Another special parallelogram, but instead of 90° angles, it has all four sides equal in length. Its diagonals are perpendicular bisectors of each other. Think of a diamond shape or a flattened square.
-
Trapezium (or Trapezoid):
This is a more general quadrilateral with at least one pair of parallel sides. Imagine a table where only two legs are exactly opposite each other. The other two legs are angled.
-
Kite:
A quadrilateral where two distinct pairs of adjacent sides are equal in length. Its diagonals are perpendicular, and one diagonal bisects the other. Just like a real kite you fly in the sky!
General Principles for Constructing Quadrilaterals: Following the Map
Constructing a quadrilateral is like following a treasure map. You're given some clues (lengths of sides, angles, or diagonals), and you use your tools (compass and straightedge) to find the 'treasure' (the vertices of the quadrilateral).
Here’s a general strategy:
- Start with a Base: Usually, you'll start by drawing one of the given sides or a diagonal as your foundation. This is your starting point on the map.
- Use Angles: If an angle is given, construct it at one end of your base line.
- Use Arcs for Lengths: Your compass is key here. To locate a vertex that's a certain distance from two known points, you draw arcs from those points with the given radii. The intersection of these arcs will be your new vertex. This is like triangulating your position!
- Connect the Dots: Once you've located all the vertices, use your straightedge to connect them to form the quadrilateral.
Step-by-Step Example: Building a Parallelogram
Let's construct a parallelogram ABCD where AB = 7 cm, BC = 5 cm, and the angle ABC = 60°.
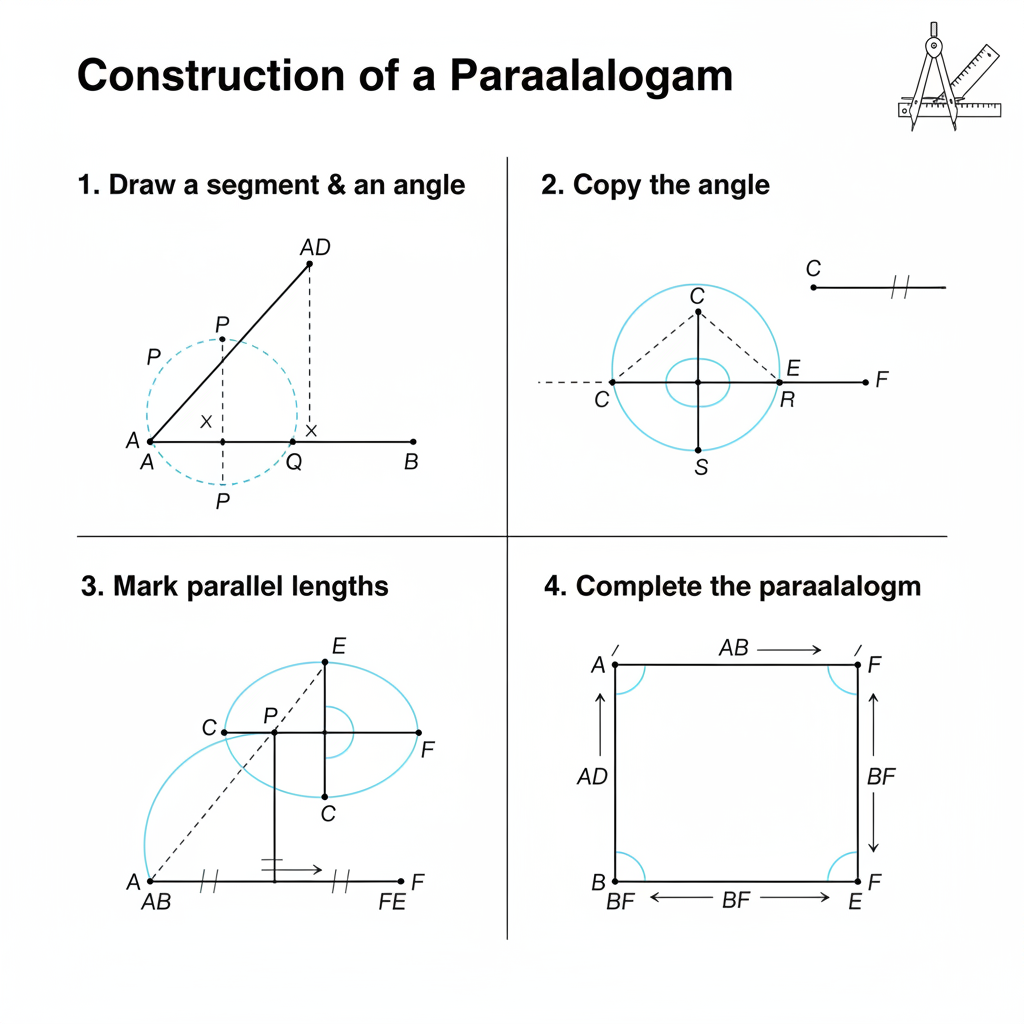 ⚠️ This picture may have spelling mistakes. Trust the words in the lesson.
-
Draw the Base: Use your straightedge to draw a line segment AB that is 7 cm long. Label the endpoints A and B.
Analogy: You've laid the first foundation beam of your shape.
-
Construct the Angle: At point B, use your compass and straightedge to construct an angle of 60°. Extend the arm of this angle upwards. Label the arm BX.
Analogy: You're setting up the first corner post at the correct angle.
-
Mark the Second Side: With your compass, open it to a radius of 5 cm (the length of BC). Place the compass point at B and draw an arc that intersects the arm BX. Label this intersection point C.
Analogy: You've measured and cut the second beam and placed it along the corner post.
-
Locate Point D (Method 1: Using Parallel Sides):
- Remember, in a parallelogram, opposite sides are equal. So, AD will be 5 cm (equal to BC) and CD will be 7 cm (equal to AB).
- Place your compass point at A. Open it to 5 cm and draw an arc above point A. This arc represents all possible locations for point D that are 5 cm from A.
- Now, place your compass point at C. Open it to 7 cm and draw another arc. This arc represents all possible locations for point D that are 7 cm from C.
- The point where these two arcs intersect is point D.
Analogy: You're using two different 'measurement lines' from existing points to pinpoint the exact location of the last corner.
-
Complete the Parallelogram: Use your straightedge to connect point A to D, and point C to D. You have now constructed parallelogram ABCD!
Analogy: You've connected the last beams to complete your structure.
Other Quadrilateral Constructions (Foundational Examples):
Constructing a Square:
If you're given one side of a square (say, 6 cm), you only need that one piece of information! Why? Because all sides are equal, and all angles are 90°.
- Draw a line segment AB = 6 cm.
- At points A and B, construct 90° angles (perpendicular lines).
- Measure 6 cm along the perpendiculars from A and B to find points D and C, respectively.
- Connect D and C. Voila! A square.
Analogy: Building a perfect box; knowing one side is enough because all sides are the same and all corners are square.
Constructing a Rhombus:
If you're given one side (say, 4 cm) and one angle (say, 70°). Remember, all sides are equal in a rhombus.
- Draw a line segment AB = 4 cm.
- At point B, construct an angle of 70° (e.g., angle ABC).
- Measure 4 cm along the arm of the 70° angle from B to find point C.
- Now, from A, draw an arc with a radius of 4 cm.
- From C, draw another arc with a radius of 4 cm.
- The intersection of these two arcs is point D. Connect AD and CD.
Analogy: Like making a diamond pattern. Once you know one side and one angle, you can use the equal side lengths to find all other points.
Why is this important?
Understanding geometric constructions isn't just a math exercise; it's fundamental to many real-world applications. Architects use these principles to design buildings, engineers to create machine parts, artists to draw perspective, and even video game designers use geometric principles to render shapes and environments. It teaches precision, logical thinking, and problem-solving.
Keep practicing with your compass and straightedge. The more you build these shapes, the more intuitive the process will become, turning complex constructions into simple 'LEGO' assemblies!
Keep learning, free
Create a free Syllabax account to unlock practice questions and games for this topic.
Visual Learning Enhanced! 🚀
To help you master this topic, we use Advanced Syllabax AI to generate detailed diagrams and visual models.
Note on Visuals: The AI sometimes makes spelling errors in image labels. Please refer to the lesson text for the correct terminology.