Construction of triangles (Constructions)
Watch this topic in 60 seconds
Free preview · Lesson 1
Understanding Construction of triangles (Constructions)
Mastering Triangle Construction: Your Blueprint for Geometric Shapes (Grade 9, Foundational)
Welcome, future architects and designers! Imagine you're building something incredible, like a strong bridge or a beautiful house. What's the most basic shape you see everywhere that provides immense strength? That's right, the triangle! Triangles are the superheroes of shapes, offering stability and rigidity in structures, from the smallest gears to the tallest skyscrapers.
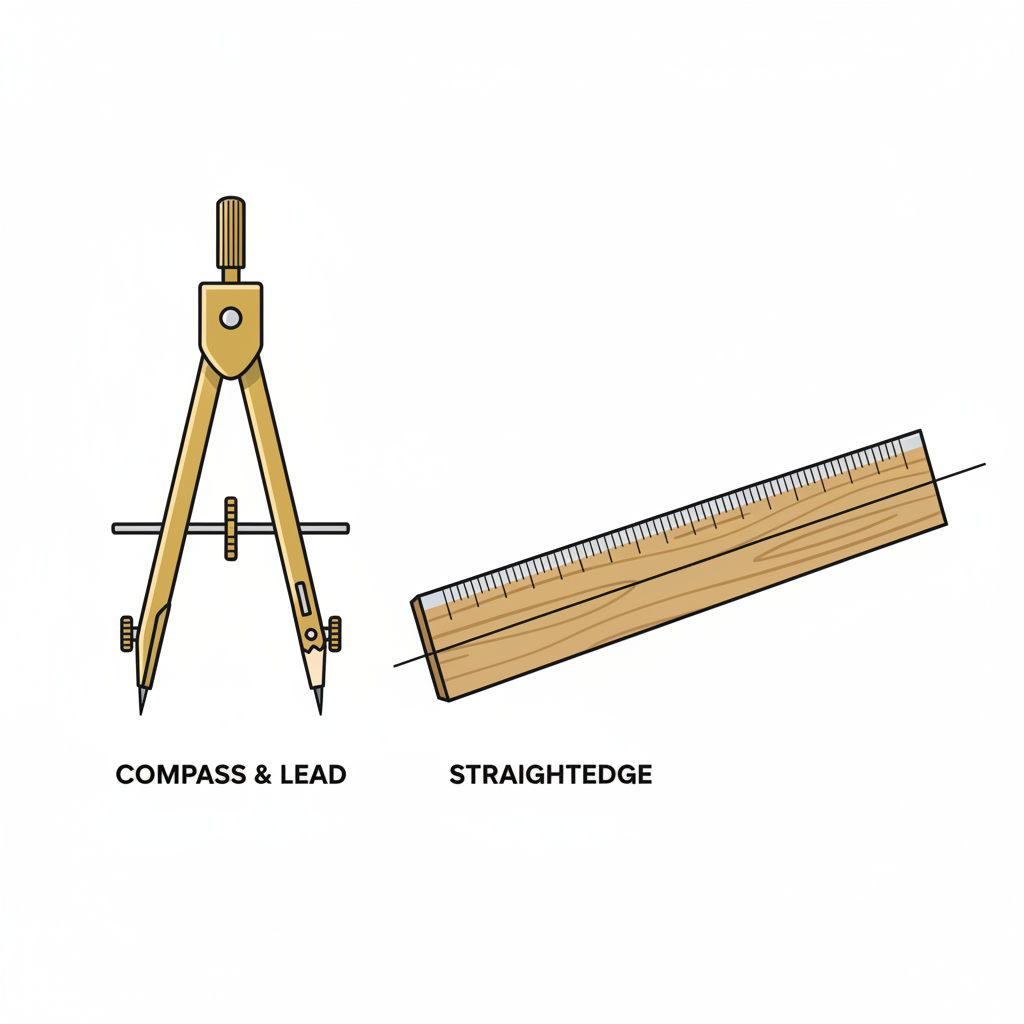
In this lesson, we're going to become geometric builders. We won't be using hammers and nails, but rather two very precise tools: a straightedge (like a ruler, but we only use its straight edge, not its measurements) and a compass. Think of it like following a super-detailed recipe to bake a perfect cake, or assembling a LEGO model according to the instructions. Every step is crucial, and precision is key!
1. The Builder's Basic Toolkit: Straightedge and Compass
The Straightedge (Your Line Master)
Imagine you need to draw a perfectly straight road on a map. You wouldn't freehand it, would you? You'd use a ruler. The straightedge in geometry is exactly that: a tool to draw straight lines or line segments. It helps you connect two points with a perfectly straight path. We don't use the markings on a ruler for measuring in 'pure' constructions; we just use its straight edge to draw lines.
The Compass (Your Circle Creator)
Now, imagine you need to draw a perfect circle, like the rim of a wheel or the face of a clock. You can't just draw it freehand and expect it to be perfect. That's where the compass comes in! A compass has two 'legs': one with a sharp point (the anchor) and the other with a pencil lead (the drawing arm). You set the distance between these two legs, and then pivot the pencil arm around the anchor point to draw perfect circles or arcs. Think of it like a tetherball pole (the anchor) and the rope (the radius) guiding the ball (the pencil) in a perfect circle.
2. Why Triangles? A Quick Refresh
Before we start building, let's quickly remember what makes triangles so special. A triangle is a polygon with three sides and three angles. The sum of the interior angles of any triangle is always 180 degrees. There are different types:
- Equilateral Triangle: All three sides are equal, and all three angles are equal (60 degrees each).
- Isosceles Triangle: Two sides are equal, and the angles opposite those sides are also equal.
- Scalene Triangle: All three sides are different lengths, and all three angles are different.
- Right-angled Triangle: One of its angles is exactly 90 degrees.
Also, remember the Triangle Inequality Theorem: The sum of the lengths of any two sides of a triangle must be greater than the length of the third side. This is like trying to connect two short sticks with a very long one – they just won't meet to form a triangle!
3. The Art of Construction: Building Triangles
Just like there are different ways to bake a cake depending on the ingredients you have, there are different ways to construct a triangle depending on the information given. We'll explore the four main ways, often called 'construction criteria'.
Method 1: SSS (Side-Side-Side) Construction
Imagine you have three pieces of wood cut to specific lengths, and you need to join them to form a triangle. This is the SSS method! You are given the lengths of all three sides of the triangle. There's only one unique triangle you can make with those specific side lengths (as long as they satisfy the triangle inequality theorem, of course!).
Steps for SSS Construction:
- Draw the Base: Choose one of the given side lengths (usually the longest or a convenient one) and draw a line segment of that exact length using your straightedge. Let's call it AB. This is like laying down the foundation beam.
- Arc from One End: Open your compass to the length of the second side. With point A as the center, draw an arc. This arc represents all possible locations for the third vertex (C) if it's that distance from A. Think of it as a searchlight from point A, showing all spots that are the correct distance away.
- Arc from the Other End: Now, open your compass to the length of the third side. With point B as the center, draw another arc. This arc shows all possible locations for the third vertex (C) if it's that distance from B. This is another searchlight, this time from point B.
- Locate the Vertex: The point where these two arcs intersect is your third vertex, C. This is where the two searchlights meet!
- Complete the Triangle: Use your straightedge to connect point C to point A and point C to point B. Voila! You have constructed your triangle ABC.
Method 2: SAS (Side-Angle-Side) Construction
Think of this like having two sturdy arms (sides) and a flexible elbow joint (angle) connecting them. You're given two side lengths and the measurement of the angle *between* those two sides (the 'included' angle). This is crucial! The angle *must* be the one connecting the two given sides.
Steps for SAS Construction:
- Draw One Side: Use your straightedge to draw a line segment of the first given side length. Let's call it AB.
- Construct the Angle: At one endpoint of this line segment (say, point A), construct the given angle using your compass and straightedge (you'd have learned how to construct specific angles like 60°, 90°, etc., or transfer an angle). Draw a ray from A at this angle. This is like fixing the elbow joint at point A and extending one arm.
- Mark the Second Side: Open your compass to the length of the second given side. With point A as the center, place the pencil point on the ray you just drew. Mark this point C. This is like measuring the length of the second arm.
- Complete the Triangle: Use your straightedge to connect point B to point C. And there you have it, triangle ABC!
Method 3: ASA (Angle-Side-Angle) Construction
Imagine you have a base (a side) and you know the angles at both ends of that base. This is like having a stage (the side) and two spotlights (angles) fixed at each end, pointing inward. The point where the spotlights meet forms the third vertex. You are given two angles and the length of the side *between* them (the 'included' side).
Steps for ASA Construction:
- Draw the Included Side: Use your straightedge to draw a line segment of the given side length. Let's call it AB. This is your stage.
- Construct the First Angle: At point A, construct the first given angle using your compass and straightedge. Draw a ray from A. This is your first spotlight.
- Construct the Second Angle: At point B, construct the second given angle using your compass and straightedge. Draw a ray from B. This is your second spotlight.
- Locate the Vertex: The point where these two rays intersect is your third vertex, C. This is where the spotlights meet.
- Complete the Triangle: The rays already form the other two sides. You have constructed triangle ABC!
Method 4: RHS (Right-angle-Hypotenuse-Side) Construction
This method is specific to right-angled triangles. You're given the length of the hypotenuse (the longest side, opposite the right angle) and the length of one of the other two sides (a 'leg'). The 'R' stands for the right angle, which is always 90 degrees.
Steps for RHS Construction:
- Draw a Line and Construct Right Angle: Draw a line L and mark a point B on it. At point B, construct a perpendicular line (a 90-degree angle) to line L using your compass and straightedge. This creates one leg of the right angle.
- Mark the Given Side: If you're given one leg (say, BC), measure that length with your compass. With B as the center, mark a point C on the perpendicular line. This is like defining the height of a wall.
- Draw the Hypotenuse Arc: Now, open your compass to the length of the hypotenuse (AC). With point C as the center, draw an arc that intersects the original line L. Let this intersection point be A. This is like finding where the top of a ladder (hypotenuse) meets the ground.
- Complete the Triangle: Use your straightedge to connect point A to point C. You now have your right-angled triangle ABC, with the right angle at B.
Tips for Becoming a Master Builder
- Sharp Pencil: A dull pencil will give you thick, inaccurate lines. Always use a sharp pencil for precision.
- Accuracy is Key: Measure carefully with your compass. Even a tiny error can throw off your entire construction.
- Light Lines First: Draw your construction lines (arcs, rays) lightly. You can darken the final triangle sides once you're sure of them.
- Practice, Practice, Practice: Just like any skill, geometric construction gets easier and more accurate with practice. Don't be afraid to try again if your first attempt isn't perfect.
Geometric constructions are not just about drawing shapes; they're about understanding the fundamental properties of these shapes and how they relate to each other. They teach you precision, problem-solving, and a deeper appreciation for the beauty and logic in mathematics. So, grab your tools and start building!
Keep learning, free
Create a free Syllabax account to unlock practice questions and games for this topic.
Visual Learning Enhanced! 🚀
To help you master this topic, we use Advanced Syllabax AI to generate detailed diagrams and visual models.
Note on Visuals: The AI sometimes makes spelling errors in image labels. Please refer to the lesson text for the correct terminology.